Assembly guide for the Poppy Torso
Robot overview
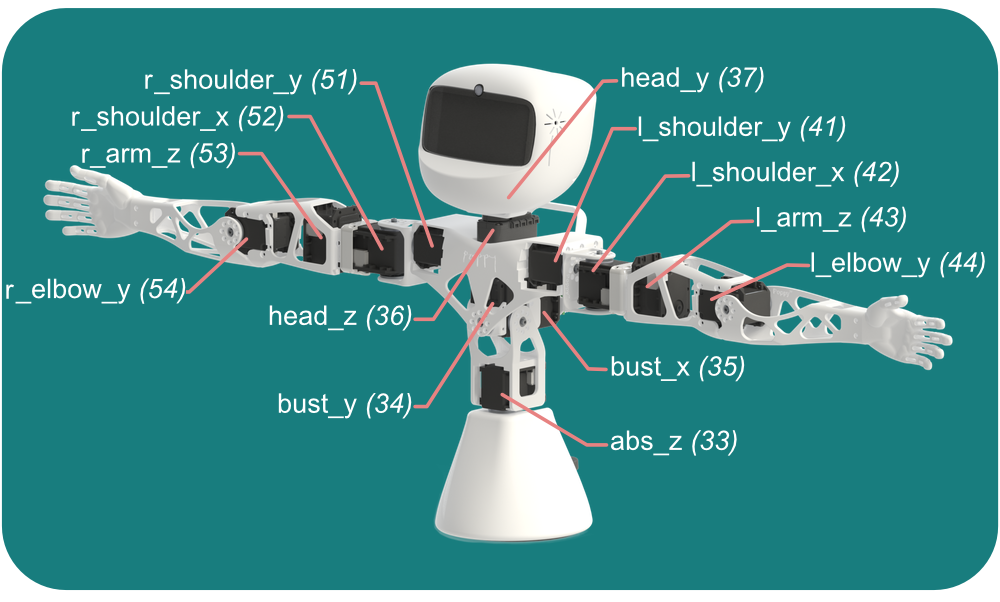
Here is the overview of the robot you are about to assemble, its 13 motor names and their associated digital id.
Videos
This assembly guide can be followed by the means of videos splitted in 25 steps (25 consecutive videos). You will find the relevant video links in the detailed steps, however, if you prefer to follow only the video playlist, here is the link to the Poppy Humanoid assembly video playlist.
Just note that your kit and the Poppy software may differ a bit from what you see in the videos. In particular:
- The videos showcase the assembly of a full Poppy Humanoid, but obivously you will not assemble the legs
- The MX-28 motor is now obsolete and is being replaced by MX-28AT, almost identical except that one of its side is already threaded: then it won't be necessary to use nuts on this side if you must insert a screw there.
- The herborist software used in the videos requires to enter the configuration parameters of each motor (communicaiton speed, digital id, ...) but the Poppy Configure tool can replace Herborist: it does the same just but you will only have to know the motor name e.g.
bust_x - There is no video assembly of the head
Assembly guide
Prepare your workbench and tools and then follow the guide step-by-step, in the list hereunder. Enjoy the assembly!
- Primordial warnings
- Bill of Material
- Mounting Dynamixel horns
- Configuring Dynamixel motors
- Arms assembly
- Full torso assembly
- Head assembly
- Wiring arrangement
- Assembly is over, check out the Programming section.
Additional information
The repositories below host older documentation that you your might also checkout:
Credits
Authors:
- Manon Cortial, Génération Robots
- Matthieu Lapeyre
- Théo Segonds
- Yoan Mollard